Prerequisites
Before you begin this lab, you'll need to set up a few tools on your machine.
ℹ️ What will you do and learn in this chapter?
You will set up the environment in Github Codespaces and understand how to run it
Required Tools
Skills
| Skill | Level |
|---|---|
| Java | intermediate |
| Maven | novice |
| Quarkus | novice |
| Angular | novice |
| REST API | proficient |
Icons & Conventions
Before starting, we will use the following icons during the workshop. Let us check their meaning:
🛠️ An action to perform,
📝 A file to modify,
👀 Something to observe,
✅ Validate something,
ℹ️ Some information.
Tools
If you want to execute this workshop on your desktop with DevContainers
I stored a configuration to set the project up in DevContainer. You can check it out in the project .devcontainer/devcontainer.json file.
If you want to know more about DevContainers, you can check out this documentation.
You MUST have set up these tools first:
- Docker
- An IDE: (IntelliJ IDEA or VSCode).
🛠️ You can validate your environment running these commands:
Docker
$ docker version
    Client:
    Docker Engine -Community
    Version:
    27.4.1
    API version:1.47
    Go version:go1.22.10
    Git commit:b9d17ea
    Built:Tue Dec 17 15:45:46 2024
    OS/Arch:linux/amd64
    Context:default
If you want to execute this workshop on your desktop (without DevContainer)
You MUST have sat up these tools first:
- Java 25+
- Maven 3.9
- Docker
- NodeJS/NPM
- Any IDE (IntelliJ IDEA, VSCode, Netbeans,...) you want.
🛠️ You can validate your environment running these commands:
Java
java -version
openjdk version "25.0.2" 2026-01-20 LTS
OpenJDK Runtime Environment Temurin-25.0.2+10 (build 25.0.2+10-LTS)
OpenJDK 64-Bit Server VM Temurin-25.0.2+10 (build 25.0.2+10-LTS, mixed mode, sharing)
Maven
mvn --version
Apache Maven 3.9.14 (996c630dbc656c76214ce58821dcc58be960875b)
Maven home: /home/alexandre/.sdkman/candidates/maven/current
Java version: 25.0.2, vendor: Eclipse Adoptium, runtime: /home/alexandre/.sdkman/candidates/java/25.0.2-tem
Default locale: en, platform encoding: UTF-8
OS name: "linux", version: "6.6.87.2-microsoft-standard-wsl2", arch: "amd64", family: "unix"
Docker
docker version
Client:
Version:           27.2.1-rd
API version:       1.45 (downgraded from 1.47)
Go version:        go1.22.7
Git commit:        cc0ee3e
Built:             Tue Sep 10 15:41:39 2024
OS/Arch:           linux/amd64
Context:           default
NodeJS
node --version
v24.11.1
NPM
npm --version
11.12.1
If you don't want to bother with a local setup It's strongly recommended to use Github Codespaces. You must create an account first and fork this repository.
You can then open this project in either your local VS Code or directly in your browser.
For the rest of this workshop, I will assume you will use GitHub CodeSpaces.
Environment Setup
🛠 Open Github CodeSpaces
- Log on GitHub and fork this repository.
- Click on
Code>Codespaces>Create a codespaceon themainbranch
When a message invites you making a URL public, select and validate it.
Wait until the codeSpace is ready.
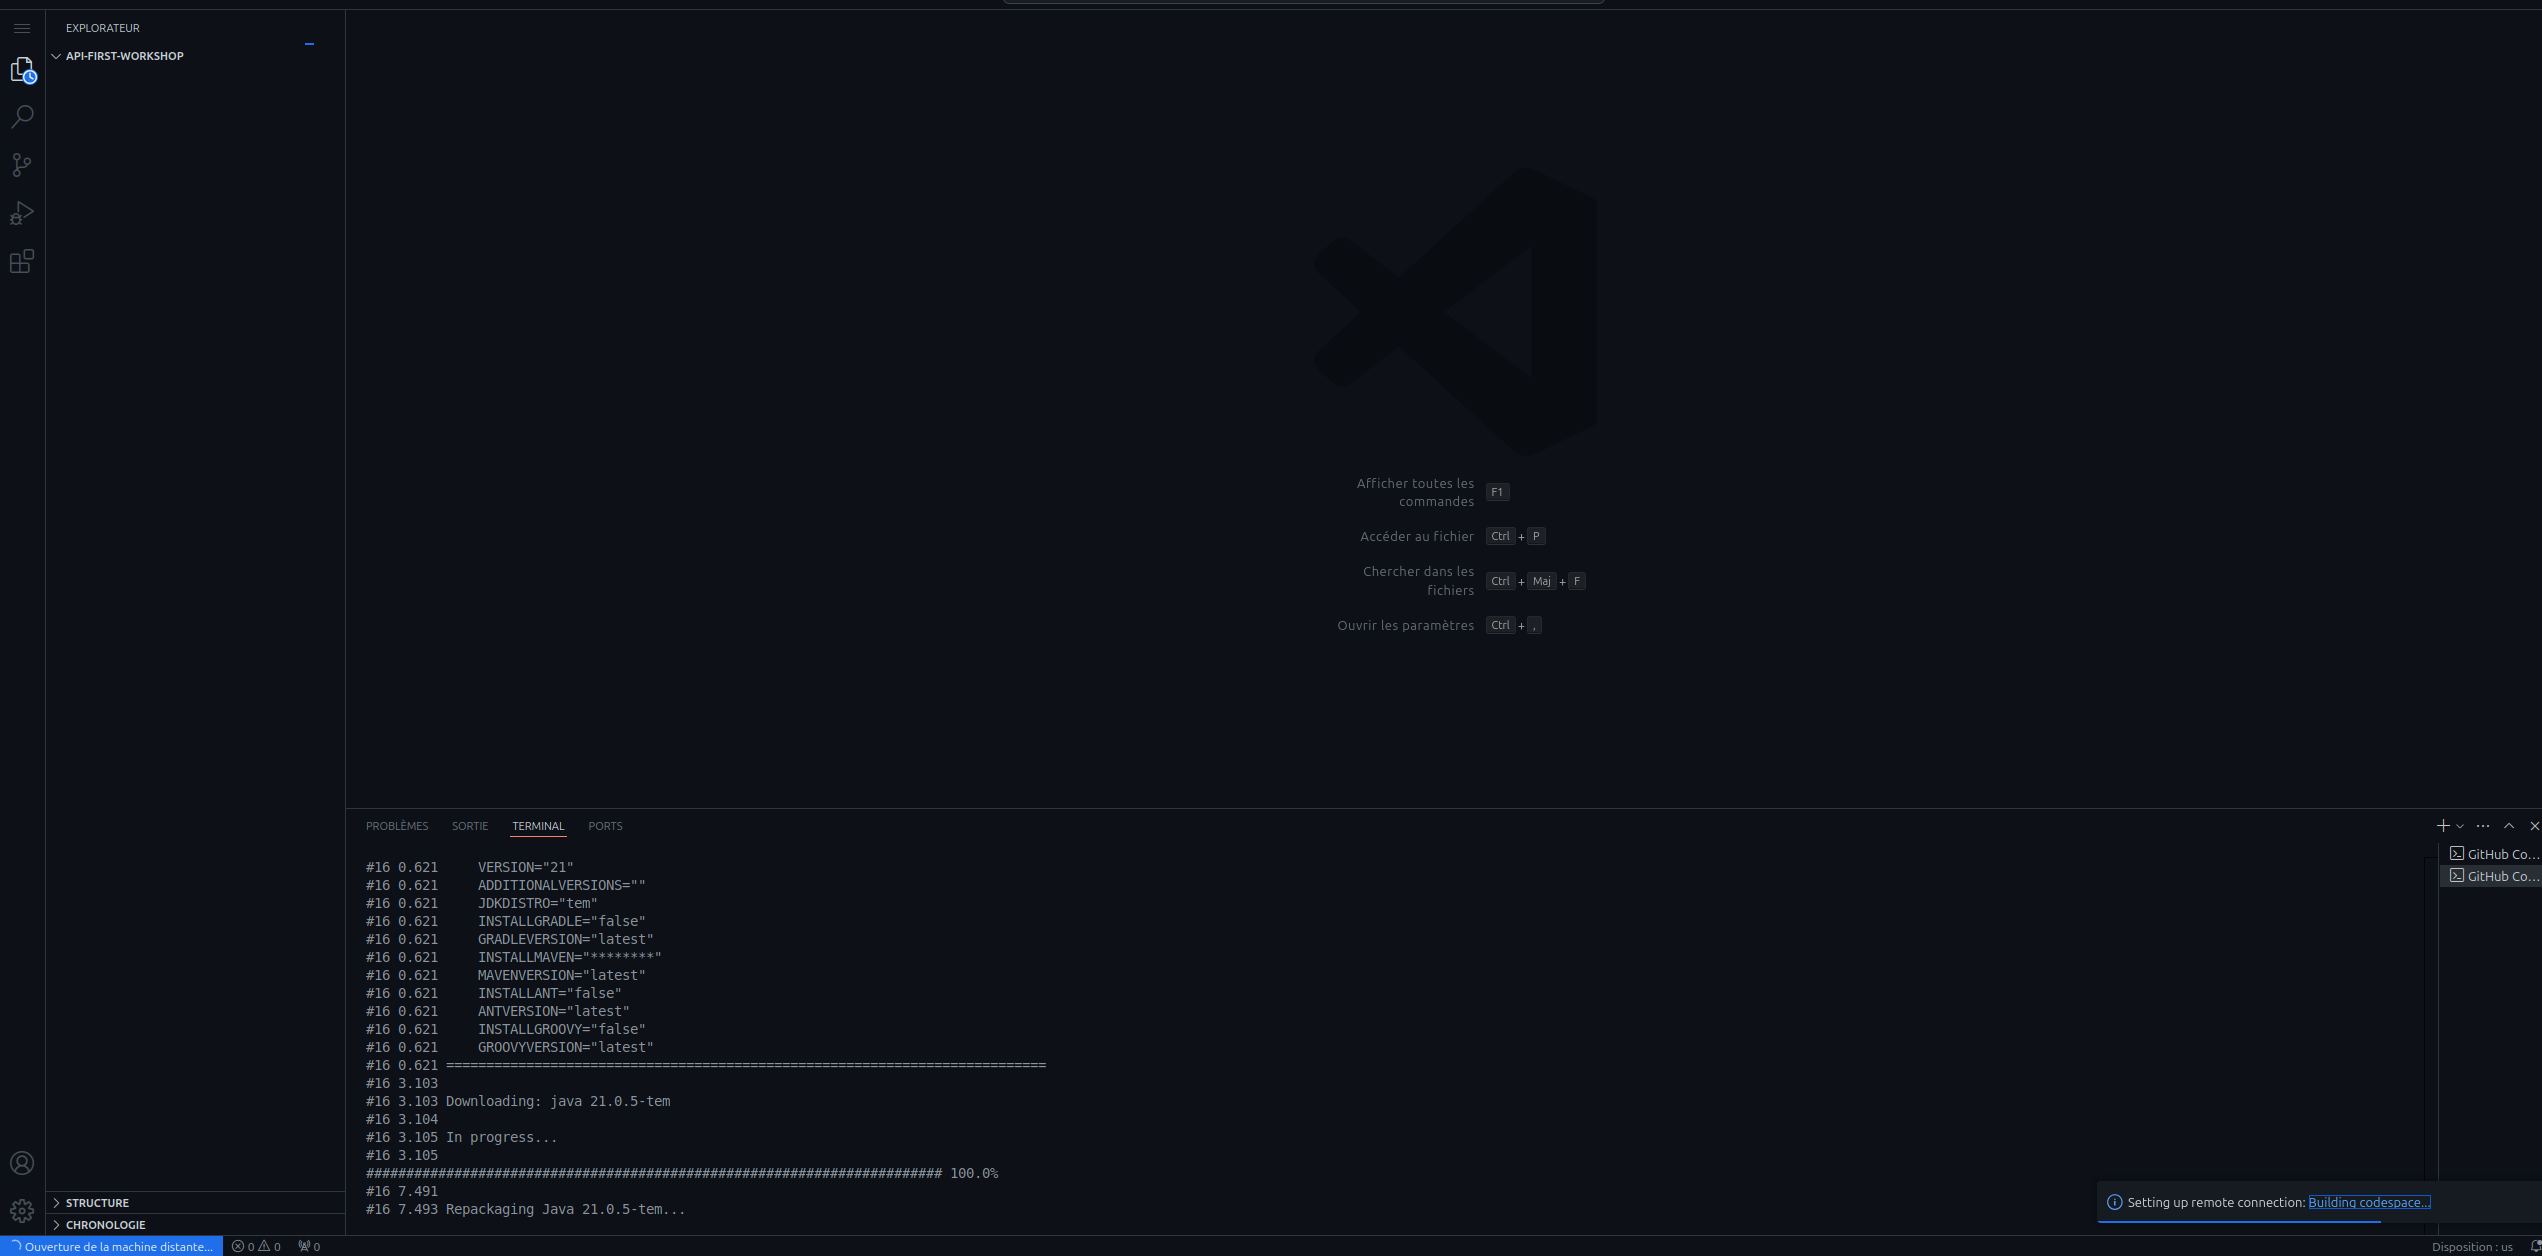
During the first startup, the maven build is automatically started. Please wait until it is completely finished.
🛠 Start the backend
In a new terminal, start the Quarkus Dev environment:
cd api
./mvnw quarkus:dev
👀 Wait a while until you get the following output:
__  ____  __  _____   ___  __ ____  ______
 --/ __ \/ / / / _ | / _ \/ //_/ / / / __/
 -/ /_/ / /_/ / __ |/ , _/ ,< / /_/ /\ \
--\___\_\____/_/ |_/_/|_/_/|_|\____/___/
2026-04-03 12:01:28,150 INFO  [io.quarkus] (Quarkus Main Thread) music-store-api 1.0.0-SNAPSHOT on JVM (powered by Quarkus 3.32.4) started in 12.962s. Listening on: http://localhost:8080
2026-04-03 12:01:28,158 INFO  [io.quarkus] (Quarkus Main Thread) Profile dev activated. Live Coding activated.
2026-04-03 12:01:28,160 INFO  [io.quarkus] (Quarkus Main Thread) Installed features: [agroal, cdi, compose, hibernate-orm, hibernate-orm-panache, hibernate-validator, jdbc-h2, narayana-jta, rest, rest-jackson, resteasy-problem, smallrye-context-propagation, smallrye-openapi, swagger-ui, vertx]
--
ℹ️ All the stack is provided through the Quarkus Dev Services. You don't therefore have to bother yourself about setting it up.
✅ Now validate your setup browsing the Quarkus DEV-UI.
Go to the VS Code Port panel.
Select the port tab:

Configure the port as public:
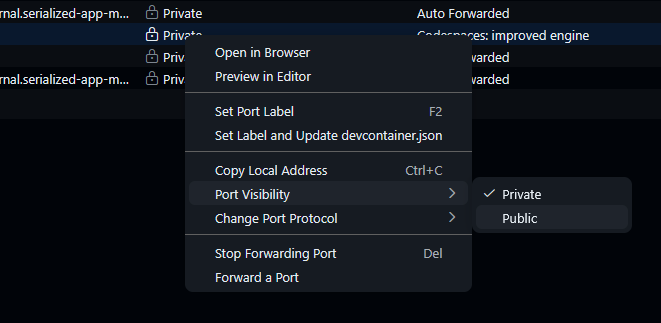
And now, go the URL which exposes the 8080 port:
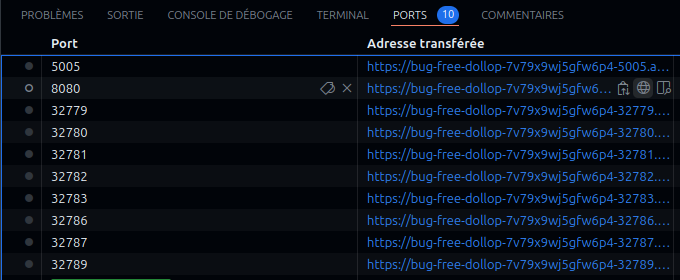
and add the /q/dev-ui suffix.
For instance: https://laughing-giggle-x5x4rqxpwfv5pj-8080.app.github.dev/q/dev-ui
ℹ️ You can also browse the dev-ui to the Extensions>SmallRye OpenAPI.
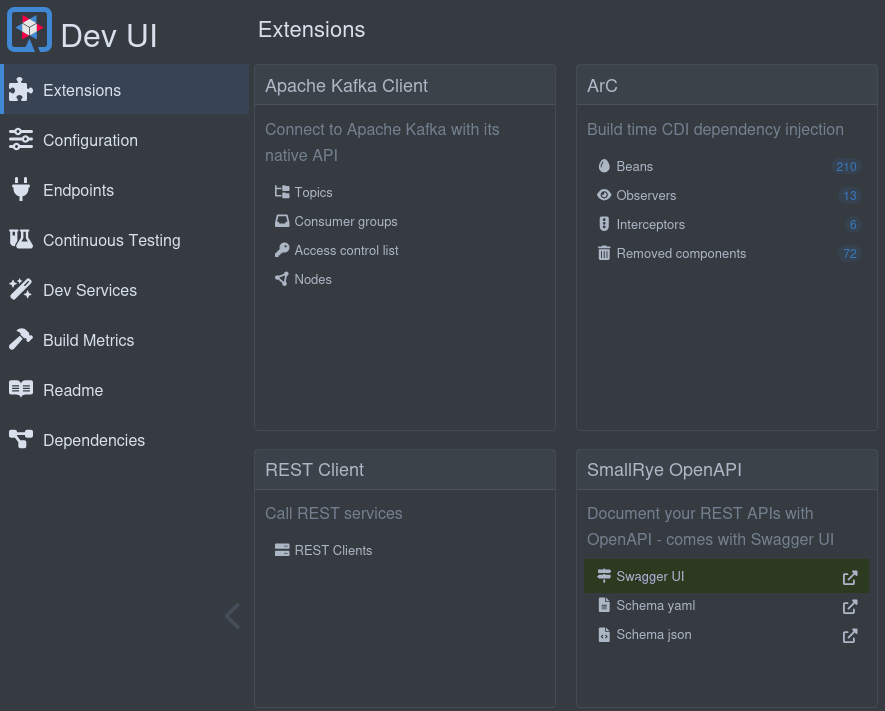
Unfortunately you will unable to test this API through the SwaggerUI. It seems to not support the usage of JSON headers.
You can test it using httpie in a new terminal :
http :8080/instruments User:'{"firstName":"john","lastName":"Doe","email":"john.doe@gmail.com","country":"FR"}' accept:"application/json"
http :8080/orders User:'{"firstName":"john","lastName":"Doe","email":"john.doe@gmail.com","country":"FR"}' accept:"application/json"
For the latter, you would get such a content:
[
    {
        "customer": {
            "address": {
                "city": "Paris",
                "country": "France",
                "number": "10",
                "street": "Rue de Paris",
                "zipCode": "75001"
            },
            "email": "alice@test.com",
            "firstName": "Alice",
            "id": 1,
            "lastName": "Smith"
        },
        "id": 1,
        "instruments": [
            {
                "description": "Classic Stratocaster",
                "id": 1,
                "manufacturer": "Fender",
                "name": "Stratocaster",
                "price": 1200.0,
                "reference": "FEN-STR-01",
                "type": "GUITAR"
            },
            {
                "description": "Classic Vibe Stratocaster",
                "id": 51,
                "manufacturer": "Squier",
                "name": "Classic Vibe Strat",
                "price": 400.0,
                "reference": "SQU-STR-01",
                "type": "GUITAR"
            }
        ],
        "orderDate": "2024-01-01T10:00:00Z",
        "orderStatus": "CREATED",
        "reference": "a0000000-0000-0000-0000-000000000001"
    },
    [...]
]
🛠 Start the frontend
Backend URL configuration
Pick up the previous URL (e.g., https://laughing-giggle-x5x4rqxpwfv5pj-8080.app.github.dev) and configure the gui/src/proxy.conf.json file to reach the backend API:
This URL : https://laughing-giggle-x5x4rqxpwfv5pj-8080.app.github.dev is just an example. Pick up the URL mentioned in the port screen of your Github CodeSpace.
Update the target and secure attributes as following:
From:
{
  "/api": {
    "target": "http://localhost:8080",
    "secure": false,
  [...]
  }
}
to
{
  "/api": {
    "target": "https://laughing-giggle-x5x4rqxpwfv5pj-8080.app.github.dev",
    "secure": true,
  [...]
  }
}
In a new terminal, start the frontend dev environment:
cd gui
npm start
👀 Wait a while until you get the following output:
> music-store-gui@0.0.0 start
> ng serve

Component HMR has been enabled, see https://angular.dev/hmr for more info.
Initial chunk files | Names                     |  Raw size
polyfills.js        | polyfills                 |  89.77 kB |
styles.css          | styles                    |  56.10 kB |
main.js             | main                      |  32.28 kB |
chunk-C4KO2HLL.js   | -                         | 614 bytes |

                    | Initial total             | 178.76 kB

Lazy chunk files    | Names                     |  Raw size
chunk-OIKUF33N.js   | order-list-component      |  23.59 kB |
chunk-VWXPALOA.js   | order-edit-component      |  22.87 kB |
chunk-BMIW6227.js   | instrument-list-component |  22.79 kB |
chunk-FZXZTTLL.js   | instrument-edit-component |  16.86 kB |
chunk-C76H5XNX.js   | -                         |   4.80 kB |
chunk-GCFUDT6G.js   | -                         |   1.67 kB |
chunk-NFXMSM4A.js   | -                         |   1.39 kB |

Application bundle generation complete. [16.550 seconds]

Watch mode enabled. Watching for file changes...
NOTE: Raw file sizes do not reflect development server per-request transformations.
  ➜  Local:   http://localhost:4200/
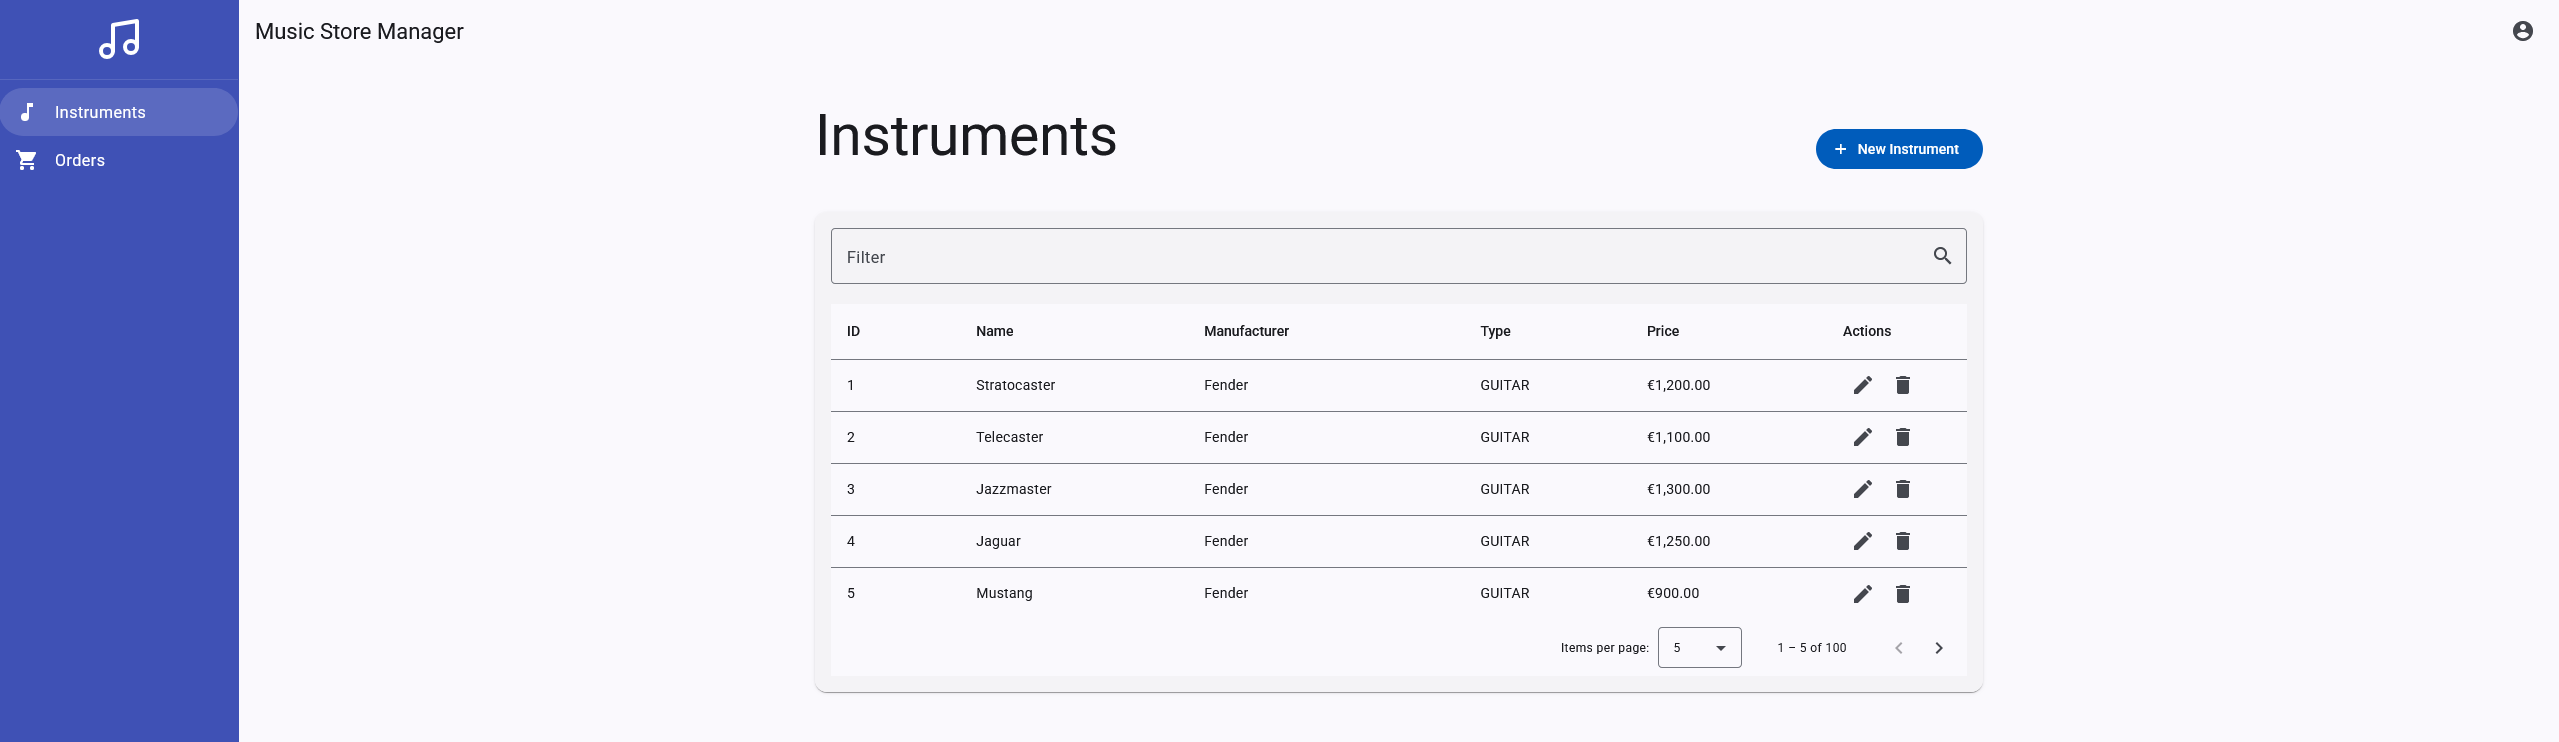
✅ Now validate your setup browsing the Music Store Manager Web UI
Go to the ports tab (see above for more details) and select the URL exposed through the port 4200 that corresponds to the process ng serve.
Open it and you should see this content: